What is Pecha Kucha? The Japanese Presentation Style Explained

Imagine this: you’re sitting through a presentation, listening minute after minute to someone reading directly from PowerPoint. Their voice is monotonous, and before you realize it, you’ve completely lost focus within minutes. Half an hour later, you’re bored and no longer following the presentation at all.
Sound familiar? We’ve all experienced the dreaded “death by PowerPoint” at some point. The good news is that there’s a solution. If you want your presentations to tell a story and keep your audience engaged, there’s one presentation style you need to know: Pecha Kucha.
Today, we will tell you everything you need to know about what Pecha Kucha is!
What you’ll learn in this article:
- What is a Pecha Kucha Presentation?
- What are the Origins of Pecha Kucha Presentations?
- How to Create a Pecha Kucha Presentation?
- The Best Practices for Creating a Pecha Kucha Presentation
- The Best Pecha Kucha Presentation Examples + Free PPT Template
- FAQ about Pecha Kucha Presentations!

What is a Pecha Kucha Presentation?
If you’re wondering what is the meaning of Pecha Kucha, here’s the answer: Pecha Kucha, “chit-chat” in Japanese, is a dynamic visual presentation format based on storytelling through images.
This format follows a structure known as 20 slides, 20 seconds: each presentation consists of 20 slides, and each slide is displayed for exactly 20 seconds before automatically advancing to the next. In total, the presentation lasts 6 minutes and 40 seconds.

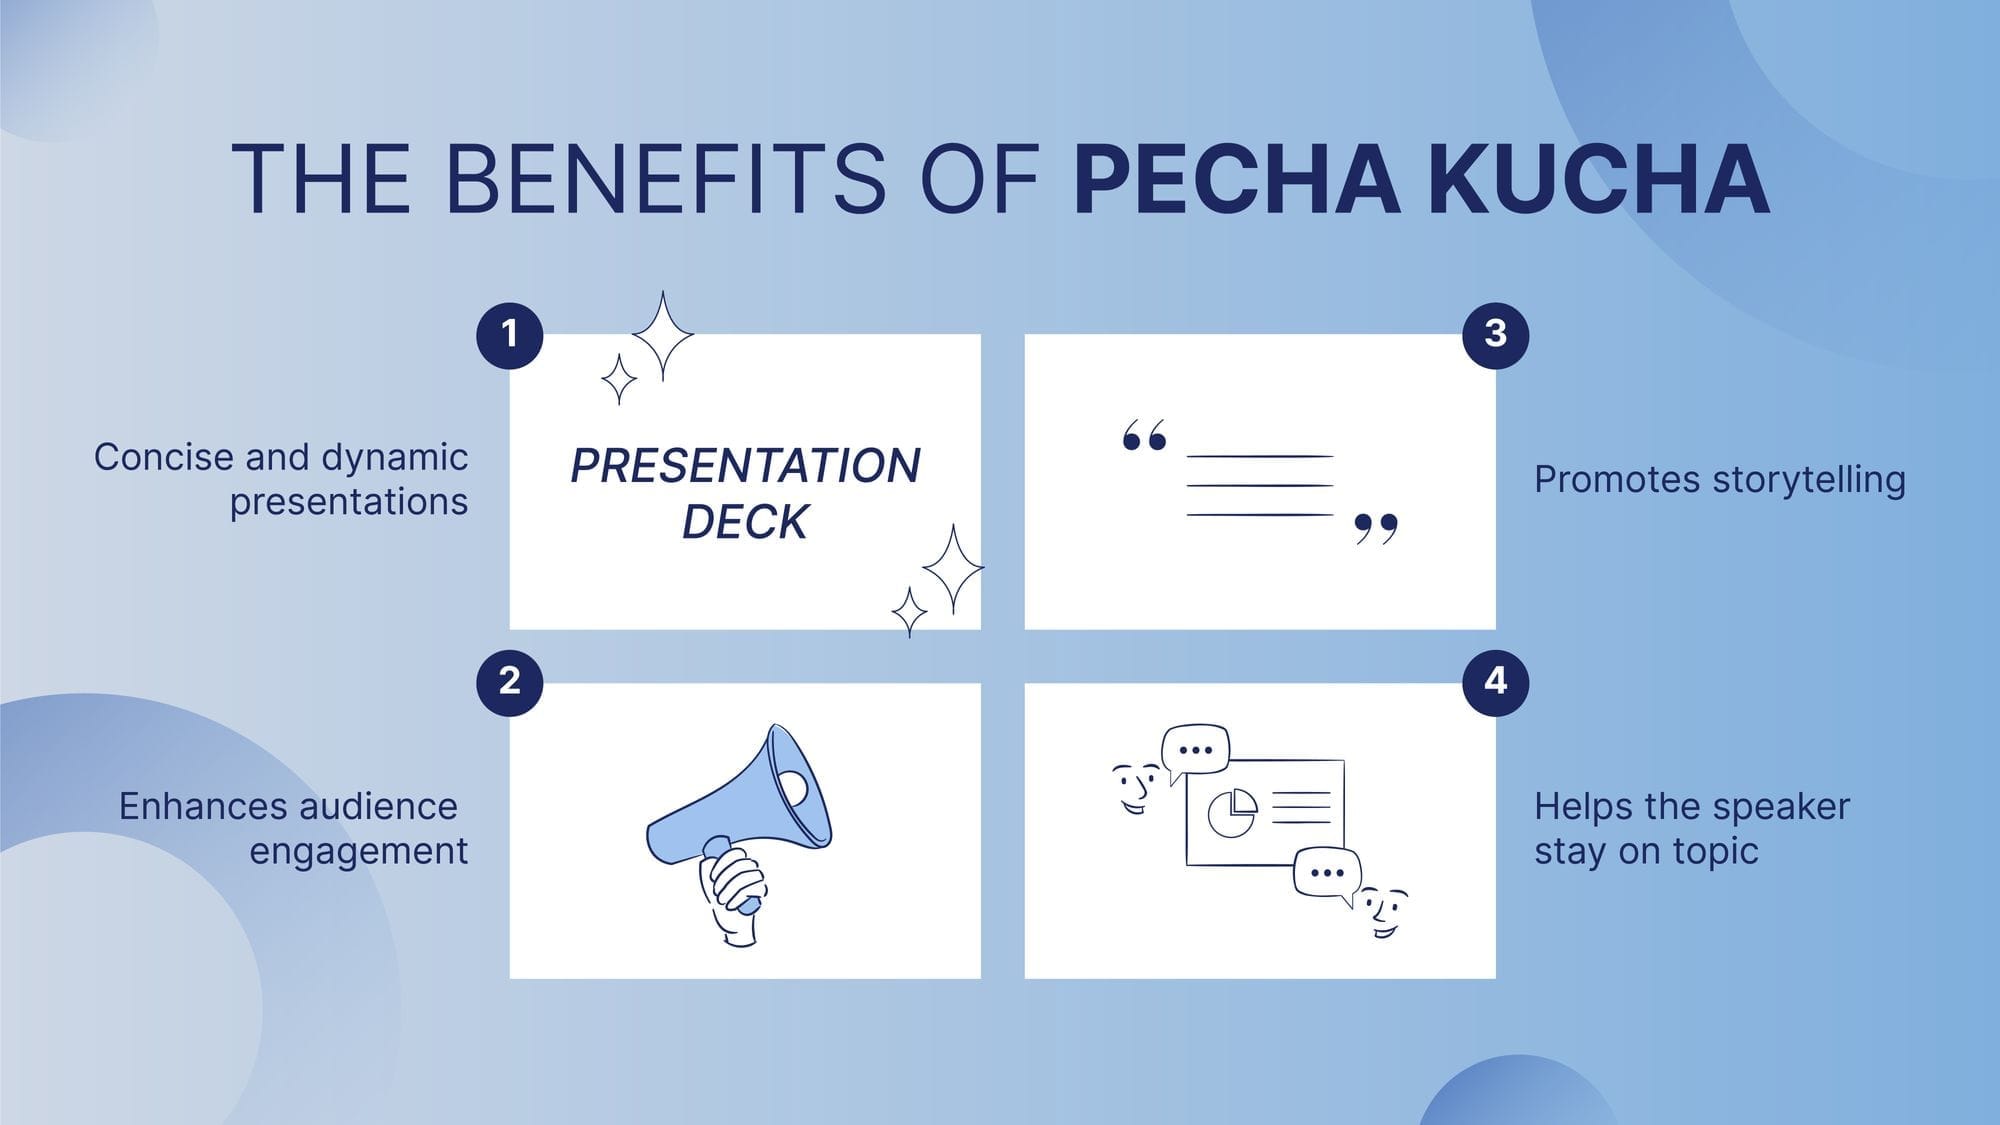
The Pecha Kucha format may seem challenging at first, but it offers huge advantages:
- It makes presentations concise, fast-paced, and engaging.
- It reduces distractions and increases audience attention.
- It forces presenters to tell a coherent story.
- It helps speakers stay focused and avoid going off-topic.
In addition, this Japanese presentation style helps develop valuable communication skills in professional, educational, and creative environments, especially when complex ideas need to be explained in a short amount of time.
What are the Origins of Pecha Kucha Presentations?
Pecha Kucha presentations were born in Tokyo in 2003, created by architects. Their goal was to provide a platform where young designers could share ideas through short, visual presentations.
The main philosophy was simple: “Talk less, show more.”
Since then, this format has expanded far beyond the design world and become a global phenomenon. Today, Pecha Kucha slides are used in conferences, businesses, universities, and creative events of all kinds.

How to Create a Pecha Kucha Presentation: Step by Step
Are you ready to create your own Pecha Kucha presentation? Let’s take a look at how to do them in PowerPoint.
1. Create the 20 Slides
In the Home Tab of PowerPoint, go to Slides and click New Slides. You can also click Ctrl + M.

If you want, you can remove any placeholders they have. To do this, just:
- Go to the View Tab.
- In Presentation Views, choose Slide Sorter and select all of your slides.
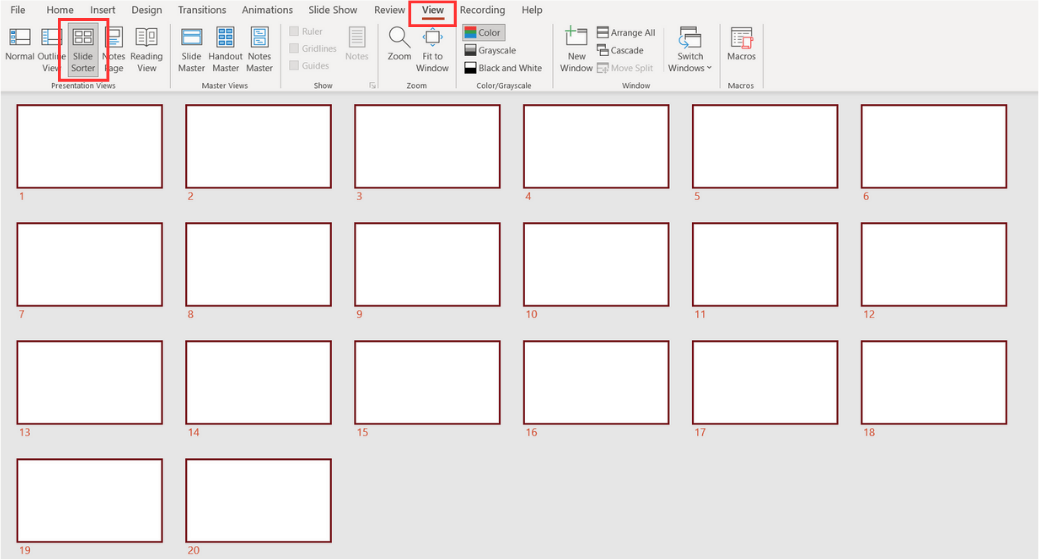
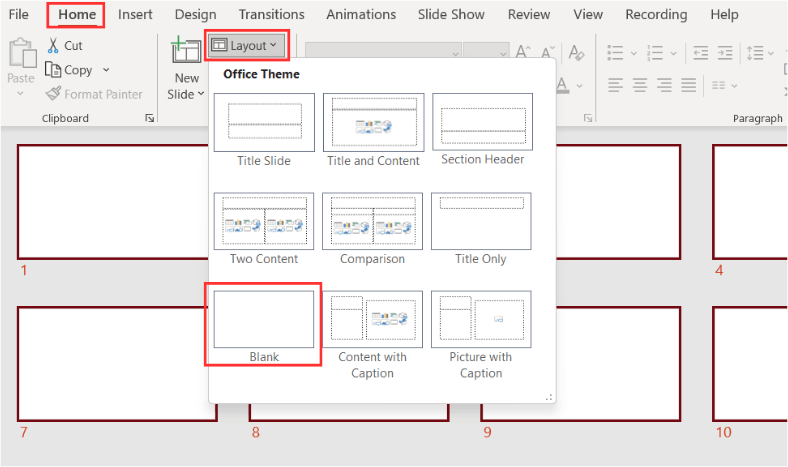
- Then, go to the Home Tab.
- Select Layout and choose Blank.
2. Set Automatic Slide Transitions
The next step to create your Pecha Kucha presentation is to set the slides to advance automatically.
To achieve this:
- Go to the Transitions Tab.
- In timing, go to Advance Slides, deselect On Mouse Click, and check After.
- Now, set the timer for 20 seconds.

3. Add Simple Transitions
Finally, you can add a Transition effect for each slide. It’s best to choose a simple one, such as Fade, and Duration 00.50.

And that’s all! Now, you can begin inserting your images and practicing your presentation.
Best Practices for Creating a Pecha Kucha Presentation
Understanding what Pecha Kucha is about is pretty straightforward, but actually doing this type of presentation can be much more difficult than people think. But we are here to help!
We have compiled the best tips and tricks from our presentation experts. Let’s take a look at what they say:
1. Before you begin…take a step back!
All experts agree on one thing: Take time to prepare your Pecha Kucha slides.
Before you even open PowerPoint, you should be able to answer:
- What story do I want to tell?
- What is my objective?
- What emotion do I want to create?
After you have all your answers, it’s time to plan. Take out your pen and paper and start drafting what you want to say. In this first draft, let your ideas flow without filtering or organizing them, and include everything you want to share.
The next step is to organize all of your ideas. To do so, group them by sections and then define the content slide by slide. Consider the following structure:
- Introduction: This is the first impression you will give to your audience. Think about how you’ll engage with them, get their attention, and connect emotionally.
- Middle: In this section, remember to keep the flow of your story, so make sure each slide is connected with the one that comes before and after.
- Closing: Consider what you want your audience to stay with. It could be an emotion, an idea, or a desire to do something. This is one of the parts your audience will remember the most.
Narrative structure is essential in any Pecha Kucha style presentation. It might take many attempts before you get the version you’ll be presenting, but don’t worry! It’s all part of the process.
2. Choose powerful images
Images are the focal point of a Pecha Kucha presentation. That’s why you should:
- Choose high-quality images: Choose the highest-quality visuals, especially if they will be displayed in full-screen mode. Clear and captivating images can significantly enhance the overall impression of your presentation.
- Align images with your message: Reflect on the content of each slide and ask yourself: "What story am I telling, and what type of image complements that narrative?" Make sure the chosen images align with and reinforce your intended message.
- Maintain coherence: Establish visual coherence throughout your presentation. If you have established a theme, choose only images that seamlessly integrate with it.
- Establish emotional connections: Consider the emotional impact your chosen pictures may have on your audience. A well-selected image can evoke emotions, making your Pecha Kucha presentation more memorable and engaging.
3. Practice, practice, practice!
One might think delivering a short presentation is much easier than giving an extended talk, but the evidence suggests otherwise.
Actually, being clear and concise is a challenge most people underestimate. It is not easy to synthesize information, stay on topic, tell a story, and connect in under 7 minutes!
This is why practice is so important, especially in this type of presentation, so make sure you follow these practice tips:
- Practice adjusting your presentation: The first few times you run through your entire presentation, time yourself and see if you need to make any adjustments to your content to stay within the 20 seconds per slide format.. You may need to omit some details or adjust your information so that all your slides are balanced.
- Practice to perfect your presentation: Once your content is adjusted and ready, shift your focus to memorizing the presentation. Pay attention to the flow of your presentation, ensuring a seamless connection between points. Additionally, practice your oratory skills—intonation, vocal tone, strategic pauses, breath control, body language, and eye contact. Every detail matters!
-Bonus tip: You can record yourself or practice in front of a mirror. This might be uncomfortable, but it will do wonders for your presentation skills.
Ready to create your own? Check out some Pecha Kucha Presentation Examples
Are you preparing a Pecha Kucha presentation? Then don’t miss these examples!
Pecha Kucha Presentation Example #1: Let’s Promote Wellness in Patients
In this example, Mark Holder talks about using positive psychology to promote health care.
What makes this presentation stand out is its ability to capture the viewer’s attention, maintain interest, and communicate effectively. Images serve as visual support, and the presentation flows in an interesting and engaging way.
Pecha Kucha Presentation Example #2: Our Words Can Create Sustained Change
In this example, Manisha Willms reflects on what it means to be healthy. She does this by showing us drawings of 4-year-olds about what the word "healthy" means to them.
As for the presentation, her use of images is different, as her slides are only focused on the children’s drawings, which complement her talk instead of guiding it. Nevertheless, they achieve the purpose of connecting with the audience by evoking emotions such as tenderness and laughter and fully complement the message she conveys.
Pecha Kucha Presentation Example #3: Let's Put More Joy into Our Lives and Work
This presentation example is more personal. In this talk, Eyoälha Baker discusses her life experiences and challenging moments, and how these helped her understand the importance of sharing joy through her work.
It shows a great example of how to connect with an audience through vulnerability and transparency. Eyoälha is not afraid of being open, showing emotion, and telling personal stories, and the audience warmly receives and embraces them.
Pecha Kucha Presentation Example #4: Slide Deck by 24Slides
Create engaging presentations with this free Pecha Kucha template, designed around the Japanese 20×20 presentation format!
You don’t need to worry about setting up the timing; this template already includes automated 20-second slides, editable layouts, and storytelling-focused designs.
Download our Pecha Kucha example for free here.


Frequently Asked Questions about Pecha Kucha Presentation
Let’s see some of the most common questions about this Japanese presentation style:
What is the difference between a PowerPoint presentation and a Pecha Kucha?
The main difference between traditional PowerPoint presentations and Pecha Kucha presentations is their style and format. While PowerPoint presentations allow flexibility in duration and presentation, Pecha Kucha presentations adhere to a specific format.
Pecha Kucha presentations usually rely heavily on visuals with minimal text to keep audiences engaged. They follow the 20x20 rule: 20 slides are displayed for 20 seconds each, automatically advancing to the next slide. This structured approach creates a concise presentation lasting 6 minutes and 40 seconds.
What is a Pecha Kucha Night?
Inspired by the success of Pecha Kucha among designers, thousands of cities worldwide began hosting their own Pecha Kucha Nights. These events consist of people getting together to present their own Pecha Kucha. The topics of the presentations can vary widely, from holiday photos to political messages, as long as presenters adhere to the 20x20 format.
If you’d like to know more about Pecha Kucha Nights or see more examples, check out this page about Pecha Kucha Nights in Dundee to get an idea about the community and atmosphere of such events.
What are good topics for a Pecha Kucha presentation?
Good topics for a Pecha Kucha presentation are those that fit well with the short format and can be represented solely through images. Some of the most common topics are:
- Personal projects or initiatives
- Travel adventures
- Reflections or ideas
- Personal stories
These subjects work effectively within the 20x20 format, allowing presenters to communicate meaningful insights without overwhelming the audience.
On the other hand, Pecha Kucha may not be the best choice for some presentations, such as data-driven presentations, details, or those with controversial topics. Because of the time limit, presentations that require extensive detail, explanation, or audience discussion are not ideal for this format.

You might also like: