Add a Real-Time PowerPoint Clock to Your Presentations

A PowerPoint clock helps you stay on schedule, making your presentation smoother and more professional. Here, you’ll learn 2 easy ways to add a real-time PowerPoint clock to your presentations.
The Quick Visual Strategy

Can I add a clock to my PowerPoint?
Certainly. In fact, you should! Adding a PowerPoint feature to show time can be really useful.
For example, at big conventions with many different presentations and events, adding a PowerPoint real-time clock can help your audience manage their time better. If your presentation has a time limit, adding a PowerPoint clock to show time can also help you ensure you don’t exceed the established schedule.
Why use a PowerPoint clock?
- At big conventions with many different events, a PowerPoint real-time clock helps the audience manage time better.
- If your presentation has a time limit, showing the time helps ensure you don't exceed the established schedule.
- It keeps global audiences synchronized, whether you are presenting in New York, London, or Tokyo.
- Establishing a clear clock on PowerPoint slides keeps your delivery seamless and highly professional.
Keep reading to learn how to add it!

How to insert a live clock in PowerPoint?
Adding a PowerPoint real-time clock is very easy! Here you’ll find 2 easy ways to show time in your presentation slides.
Option 1: Insert clock in PowerPoint with the built-in feature
Luckily, if you want your PowerPoint presentation to show time, there’s a built-in function. You just need to go to the Insert tab > Date &Time option (in the ‘Text’ group).

Then, a dialog box will appear to customize the information you want to display. Check the box Date and time, and use the arrow to choose between different ways to convey your date/time. Finally, verify that the Update automatically option is checked too.
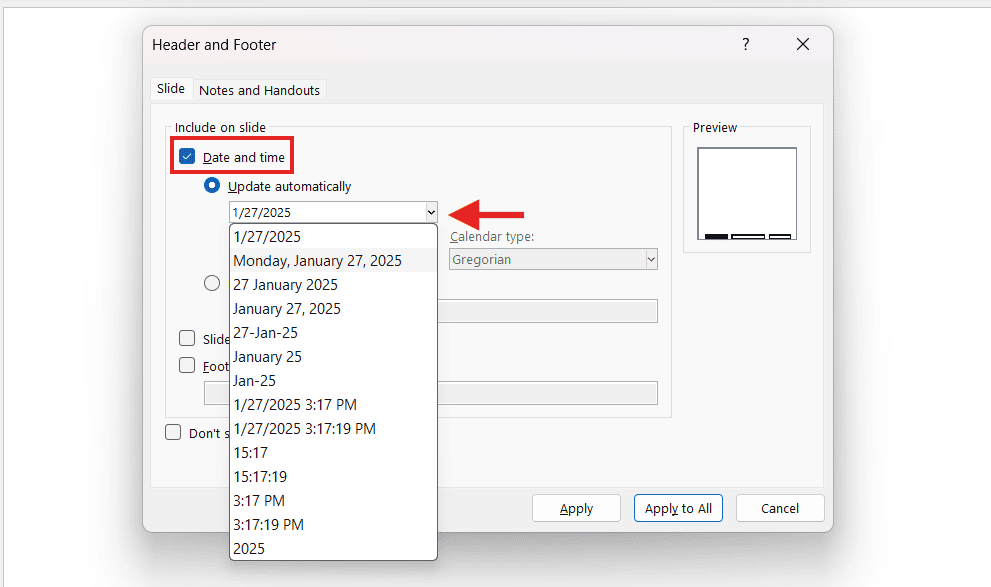
The clock will appear in the bottom left corner as a footer. Remember that you can always change its font color, style, and size.
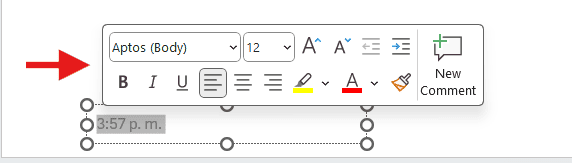
Consider that this PowerPoint real-time clock will only update when you change slides in presentation mode. If you plan to stay on the same slide for a long time, it’s probably not what you’re looking for.
Also, since it’s a footer option, there are not many customization options. Still, it’s a great option for those looking for a simple and effective way to show time in your PowerPoint without it being too distracting for your audience.
Option 2: Add a live clock in PowerPoint using macros
If the built-in footer does not fit your presentation layout, you can build a fully customized real-time digital clock using code. This method uses a VBA script to transform a standard text box into a running digital clock widget.
Step 1: Create a Macro-Enabled Presentation:
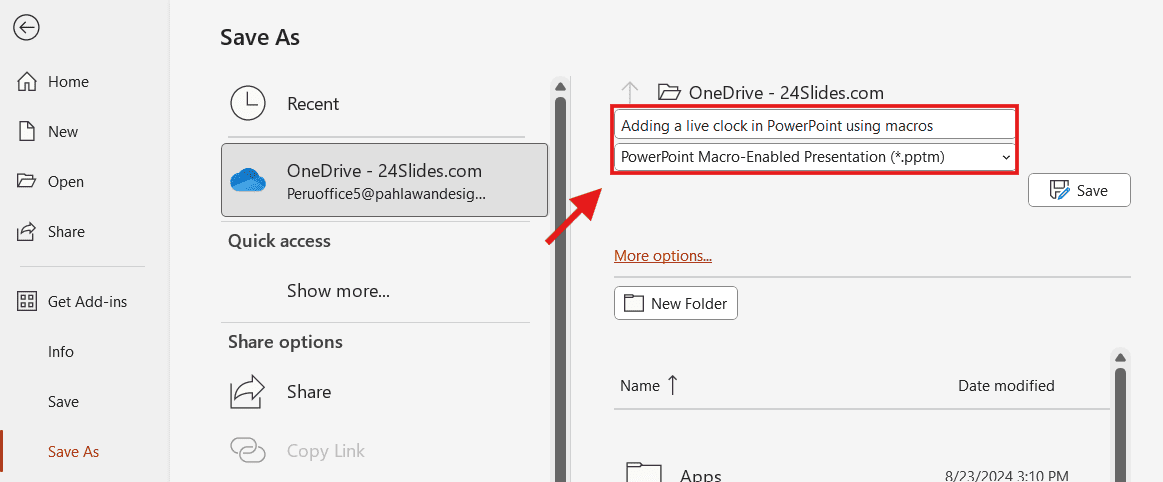
- Open PowerPoint and select File > Save As.
- Choose PowerPoint Macro-Enabled Presentation (*.pptm).
- Enter a name for your presentation and click Save.
Step 2: Enable the Developer Tab
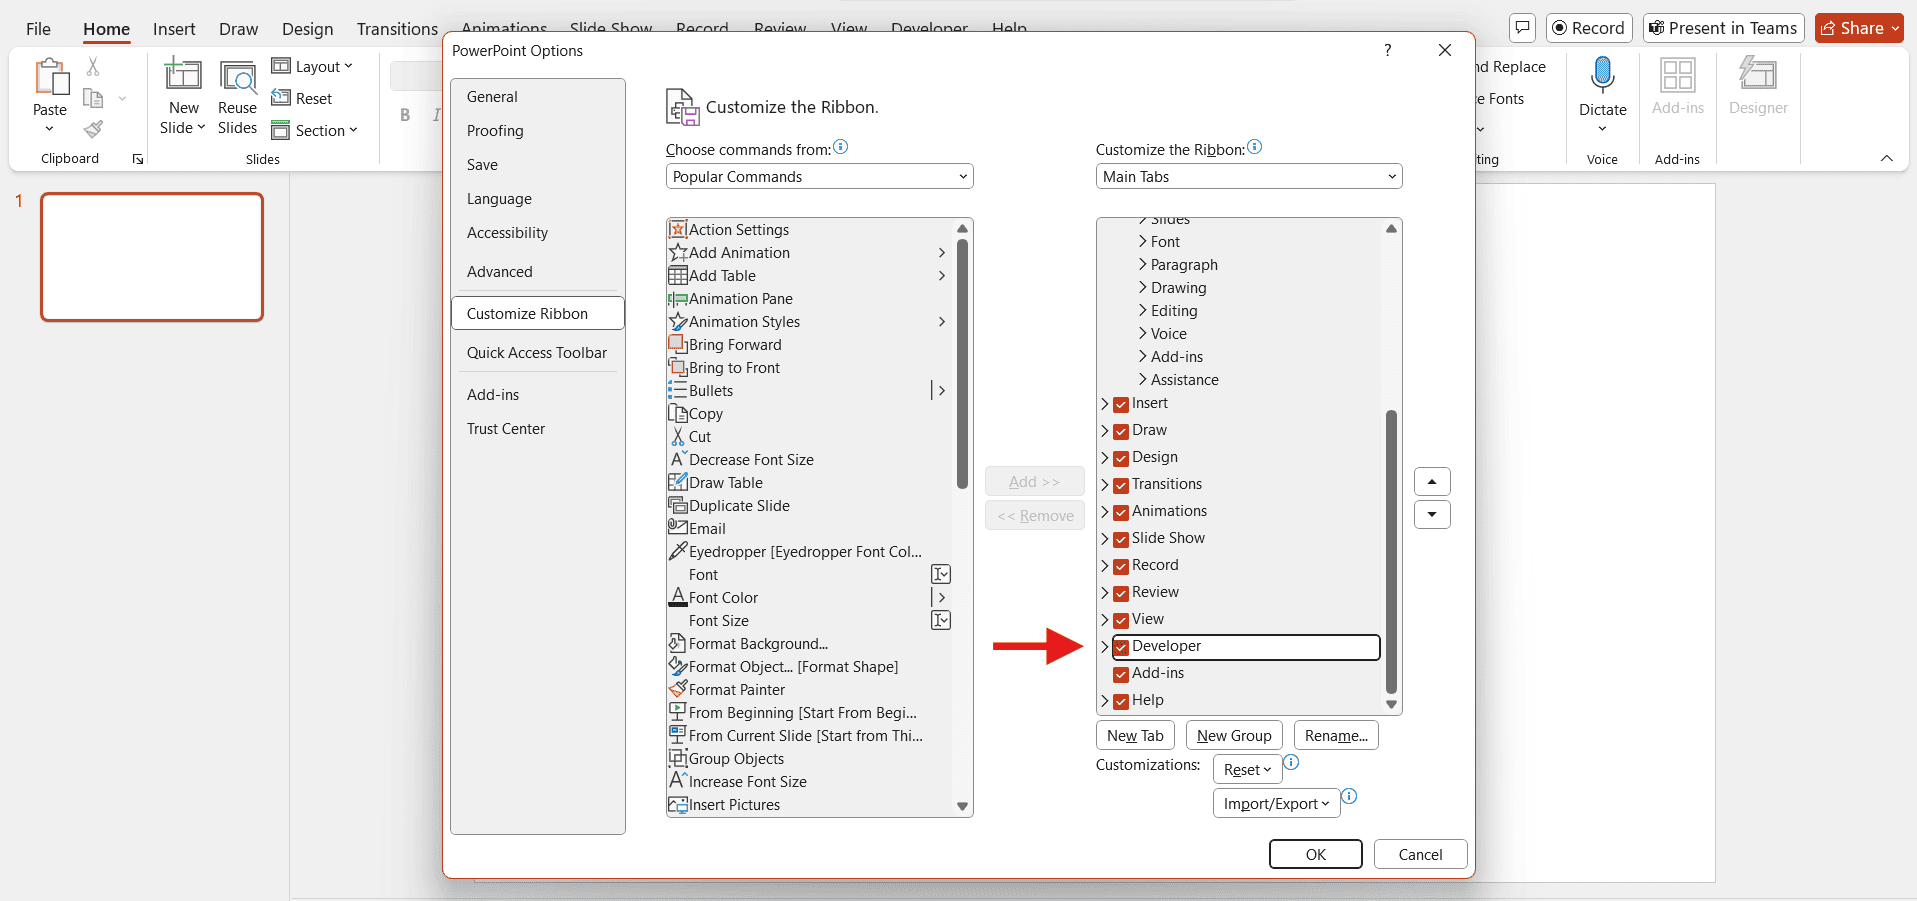
- Go to File > Options > Customize Ribbon and check the Developer box.
Step 3: Create the Macro
- Go to the Developer tab and click on Macros.
- Name your macro (e.g., "Clock") and select Create.
- In the Visual Basic Editor, paste this code. Then, close the window.
Copy the code below:
Sub Clock()
Dim time As Date
Dim minutes As Integer
time = Now()
minutes = 1440
time = DateAdd("n", minutes, time)
Do Until Now() = time
DoEvents
With ActivePresentation.Slides(1).Shapes(1).TextFrame.TextRange
.Text = Format(Now(), "h:mm:ss AM/PM")
End With
Loop
End Sub

Step 4: Insert a Text Box and Assign the Macro
- Go to Insert tab > Tex Box. Draw a text box on your slide and type "clock."
- Highlight the text box and go to Insert > Action. Choose "Run Macro" and select your macro.

Step 5: Run Your Presentation
- Start your presentation and click the text box to activate the live clock.

Finally, customize your PowerPoint clock by adjusting the font, adding animations, or applying a background to make it stand out.
Tip: Create the live clock first, then add content to avoid functionality issues.
Summary:
Frequently Asked Questions
Why should I add a clock to PowerPoint presentations?
Integrating a PowerPoint clock directly into your slide deck provides several key advantages:
- Strict Pacing: Keeps multi-speaker events or corporate conventions running on an exact, predictable schedule.
- Audience Engagement: Minimizes viewer distraction by preventing people from looking away at wall clocks or phones.
- Global Alignment: Synchronizes remote, cross-border audiences across different time zones during virtual event streams.
How do you change the formatting of a clock on PowerPoint slides?
If you want your PowerPoint clock to match your presentation branding, you can easily customize its appearance:
- Font Adjustments: Highlight the footer text box to modify the font size, type, or weight to fit your layout.
- Color Changes: Apply your exact corporate brand colors to the numbers to make them stand out or blend in seamlessly.
- Shape Effects: Select the frame boundary to add a background fill, border, or shadow effect for better legibility.
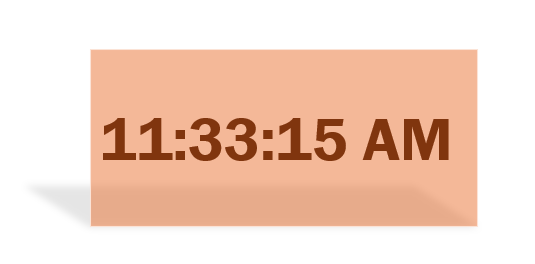
Can I insert a flash clock for PPT?
No, you can’t insert a Flash clock for PPT anymore because Adobe Flash is obsolete and no longer supported. Microsoft removed Flash support, starting with PowerPoint 2016.
Flash clocks used to be a great option, but due to Microsoft’s restrictions, the best alternative now is to use a real-time clock. This article covers two simple methods to add it: using PowerPoint’s built-in feature or Macros.
Can I use a live clock in a PowerPoint presentation without macros?
Yes, you can insert a live clock in PowerPoint without macros by using built-in features.
Go to the Insert tab > Date &Time. Then, check the Date and time box and choose what you want to display. Verify that the Update automatically option is checked and click “Apply to All.” Your clock will appear as a footer.
Is it possible to add animations to the live clock in PowerPoint?
Yes, here are some methods depending on how you added the live clock:
Animating a Live Clock Created with Macros
- Step 1: Create a text box where the time will be displayed.
- Step 2: Select the text box, go to the Animations tab, and choose an animation effect.
- Step 3: Use the Animation Pane to adjust the timing and order of animations. You can make it start automatically or by clicking on it.
Using PowerPoint Built-in Features.
- Step 1: Insert the clock (Insert > Date & Time).
- Step 2: Select the text box, go to the Animations tab, and select an animation effect.
- Step 3: Customize the animation settings in the Animation Pane.
How do I insert a live date in PowerPoint?
- Step 1: Go to Insert > Date & Time (in the ‘Text’ group).
- Step 2: Check "Date and time" and select "Update automatically."
- Step 3: From the dropdown menu, select your preferred date format (e.g., "Friday, January 31, 2025").
- Step 4: Click "Apply to All" to add it to every slide.
Take your presentations to the next level with 24Slides
Adding a live clock in PowerPoint helps manage time effectively and ensures everyone stays on track. However, to truly captivate your audience, you will need a lot more than that. So, why not focus on the content and let the experts manage the rest?
At 24Slides, we turn ordinary presentations into stunning visual experiences. With over 12 years of expertise, we’re the world’s largest presentation design company.
With just a few clicks and thanks to our faster turnaround times, you will get a professional presentation in no time. And the best of all? You can try us for just $1! You’ll get a custom, editable slide tailored to your brand for just one dollar.
Don’t miss this incredible deal—from $43 down to just $1!

Want to make better PowerPoint slides? Read this!
- PowerPoint Charts, Graphs, & Tables Made Easy | Tips & Tricks
- Mastering the Art of Presenting Data in PowerPoint
- PowerPoint 101: The Ultimate Guide for Beginners
- How to Make a Venn Diagram in PowerPoint: Quick Guide
- How to Create a Pie Chart in PowerPoint (+Free Templates)
- How to Add a Countdown Timer for PowerPoint
- How to Use PowerPoint Speaker Coach for Flawless Presentations