Turn Your PowerPoint into a Video: Step-by-Step Guide

Ever wondered how to share your PowerPoint without compatibility headaches or losing your audience's attention? Turning your slides into a video is the easiest and most professional solution. It's perfect for social media, email, YouTube, or even digital displays, viewable by anyone, anywhere.
At 24Slides, we live and breathe presentations, having helped craft millions of impactful slides for professionals just like you. We know firsthand how much a great presentation matters and how a video can make it shine even brighter.
In this guide, we'll show you how to quickly save your PowerPoint as a video. It covers the latest versions, such as Microsoft 365 and PowerPoint 2021, and includes our pro tips for a polished, professional look. Let's get started!

Here are the topics we'll cover:
- Why Turn a PowerPoint into a Video? The Benefits
- Elevate Your Presentation: How to Record a PowerPoint Presentation with Audio (Highly Recommended)
- How to Save a PowerPoint as a Video (Windows & Microsoft 365)
- Frequently Asked Questions (FAQ)
- Go From Slides to Standout Presentations with 24Slides
Why Turn a PowerPoint into a Video? The Benefits
Thinking of saving your PowerPoint as a video? Smart move. At 24Slides, we see businesses of all sizes choosing this option because it solves common presentation challenges, providing a seamless experience for both you and your audience.
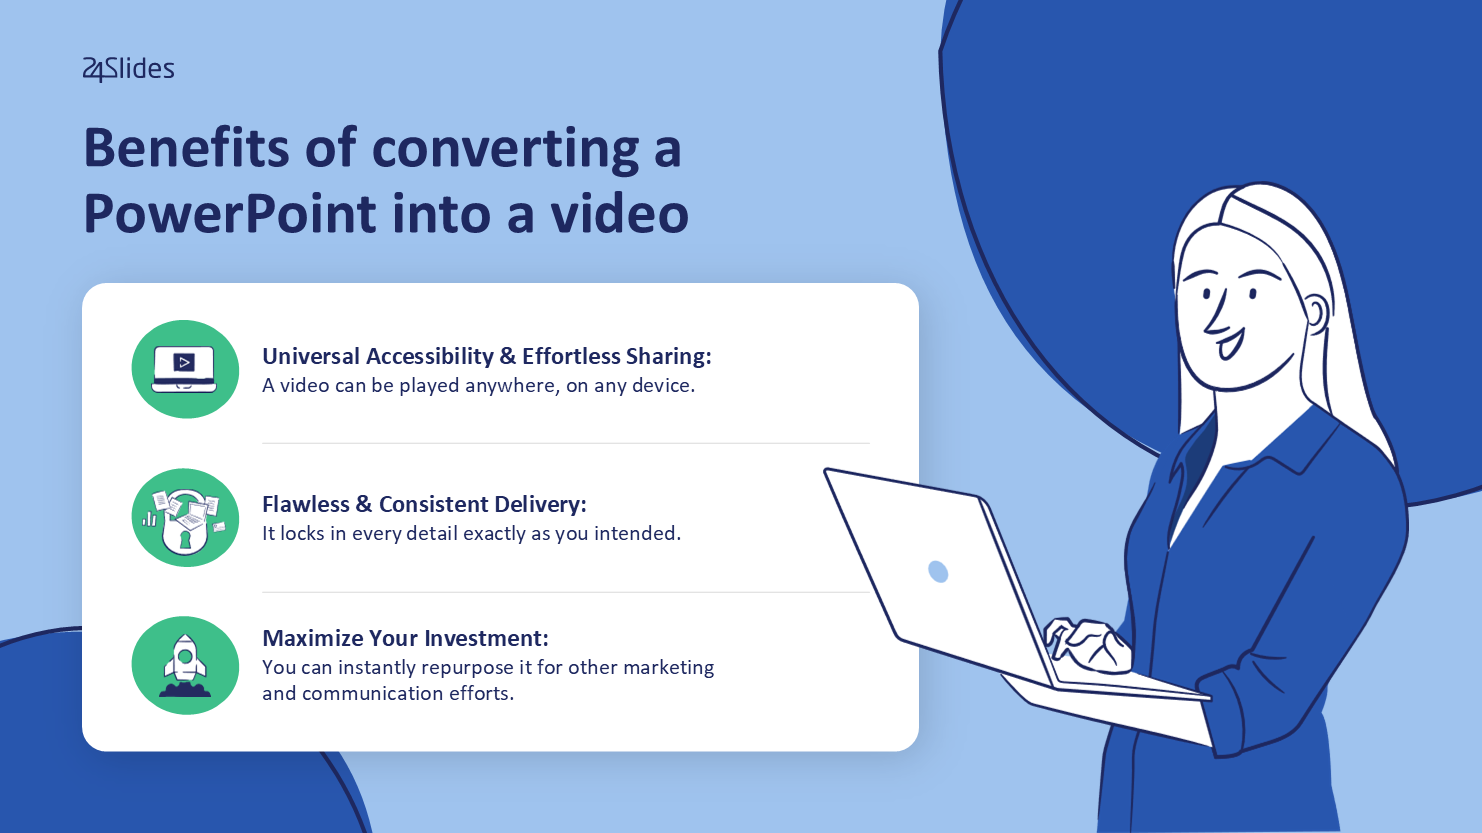
1. Universal Accessibility & Effortless Sharing
Unlike a standard PowerPoint file (pptx), a video can be played anywhere, on any device. It's incredibly easy to share with a wider audience, as it doesn't require any special software or knowledge to view. This makes it perfect for sharing on platforms like social media, YouTube, or even as an email attachment.
2. Flawless & Consistent Delivery, Every Time
When you share a presentation, you risk accidental edits, font issues, or messed-up animations and timings on another computer. A video eliminates all that! It locks in every detail exactly as you intended, giving you a perfectly self-running version that delivers your consistent message, flawlessly, every single time.
3. Maximize Your Investment: Repurpose & Extend Reach
The presentations you create are valuable assets. By converting your PowerPoint into a video, you can instantly repurpose it for other marketing and communication efforts. Use it on your company's website, as a part of an online course, or in a marketing campaign to increase the return on investment of your hard work.
Now that you know how a video can guarantee consistent delivery and reach a wider audience, let's get into the process, starting with how to record your presentation with narration and audio.
Elevate Your Presentation: How to Record a PowerPoint Presentation with Audio (Highly Recommended)
While you can save your presentation as a silent video, adding narrations or audio is highly recommended to create a professional, self-running presentation. This not only enhances engagement but also clarifies your message, making your video much more effective.
Already have audio, or prefer a silent video (e.g., for a kiosk display)? Feel free to jump ahead to the section on How to Save a PowerPoint as a Video.
Before we begin, let's quickly clarify: recording narration is for capturing your live voice (and optionally video) directly. Adding audio is for inserting pre-recorded sound files, like music or an existing voice-over, or even recording short audio clips on the spot. We'll guide you through both powerful options below.
Bringing Slides to Life: How to Record Narration & Timings in PowerPoint
Recording your own narration is the most dynamic way to personalize your presentation and ensure your message resonates. It allows you to:
- Boost Engagement: Connect with your audience on a more personal level.
- Control Pacing: Precisely manage how long each slide is displayed.
- Ensure Clarity: Deliver your message with the exact intonation and emphasis you intend.
When you record your narration, PowerPoint saves the audio and slide timings directly inside the presentation file (.pptx), but this step does not create a video yet. You will perform the final export in the next section.
Here’s your step-by-step guide to recording:
Step 1: Opening the Record Window
You have two easy ways to open the record window:
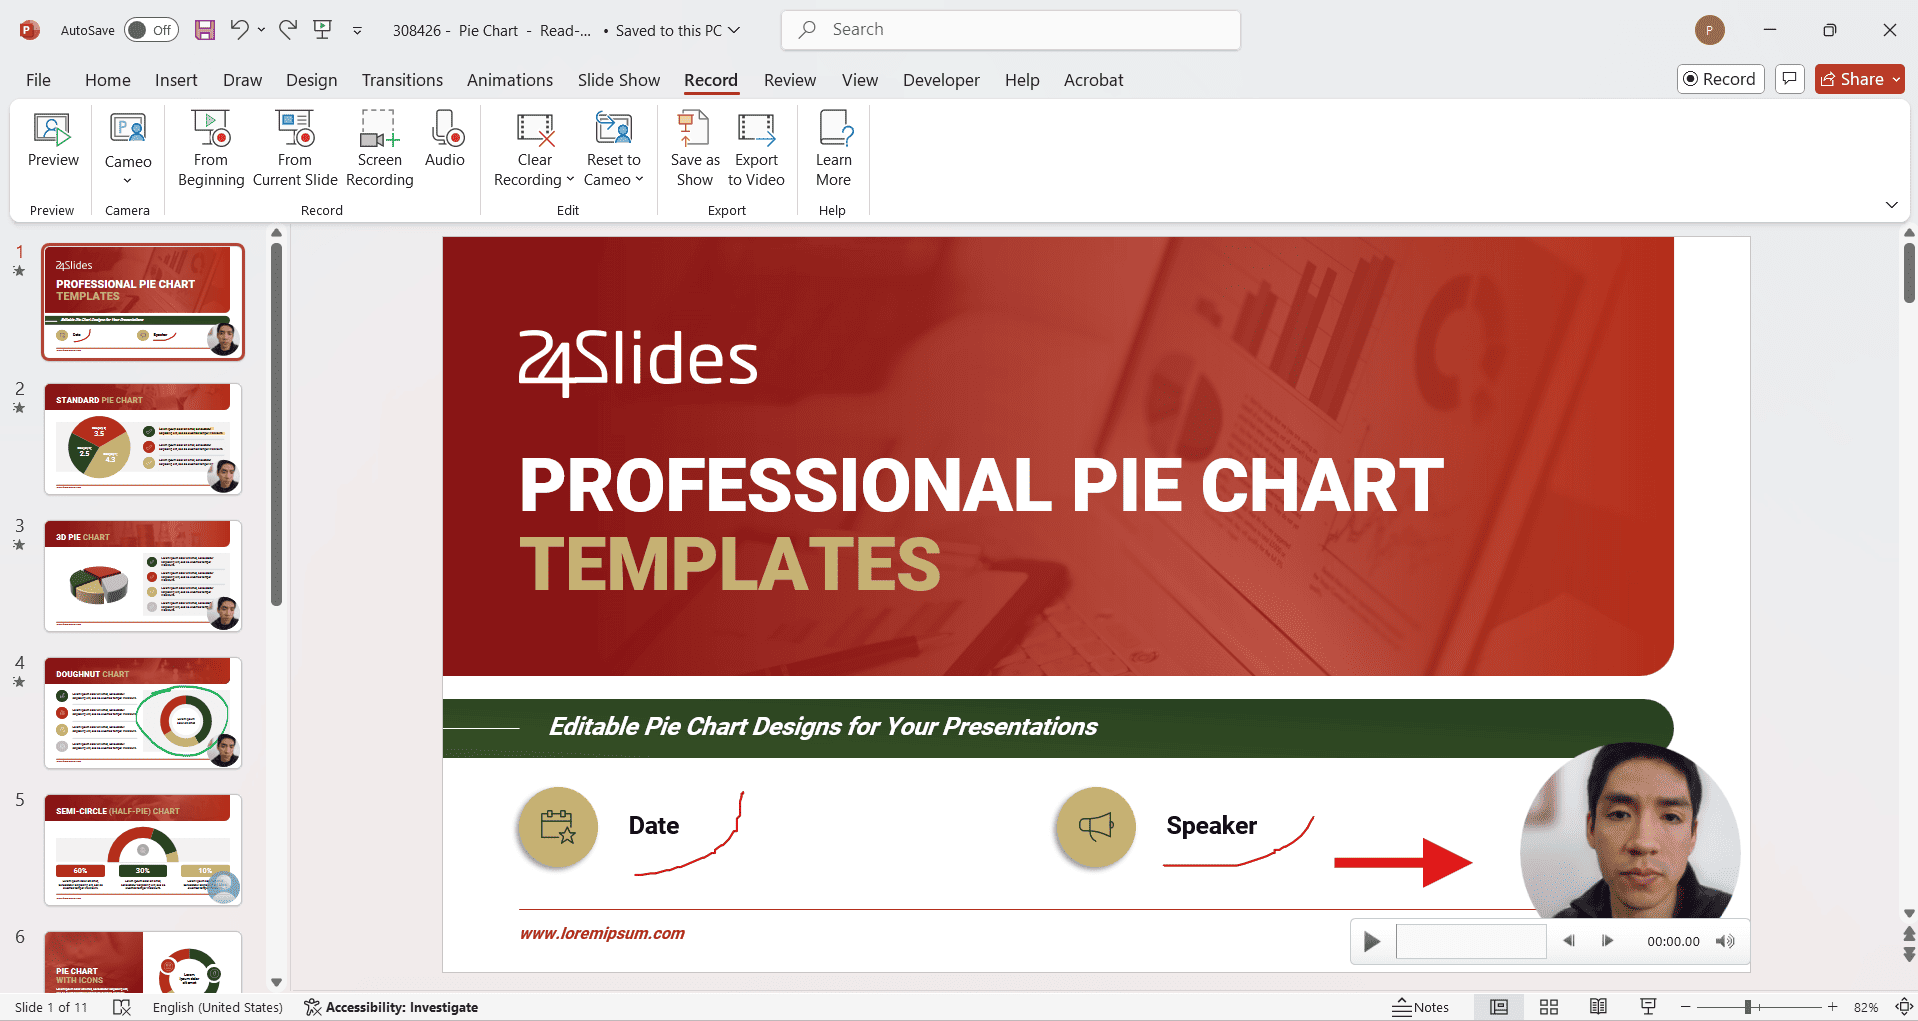
1. Quick Start: Simply click the "Record" button. This will immediately open the record window within your current slide.
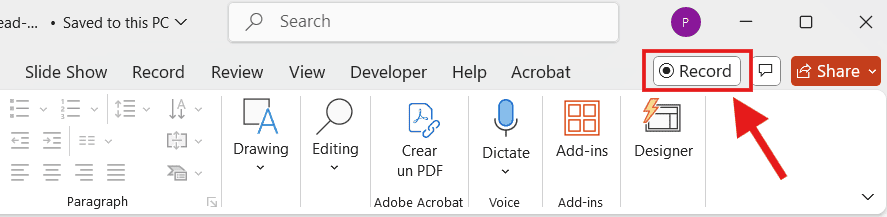
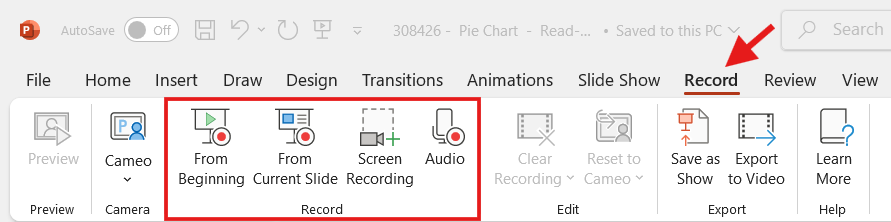
2. Full Access: Navigate to the "Record" tab in your ribbon to explore all available recording tools. Here, you'll find options like "Record from Current Slide" or "Record from Beginning" to start your narration.
Pro-Tip: If the "Record" tab isn't visible, you might need to enable it. Go to File > Options > Customize Ribbon and ensure the "Record" checkbox is selected.
Once you've selected to record (either via the quick button or a tab option), PowerPoint will open the dedicated Recording Window.
Step 2: Configure Your Mic, Camera, and Notes
- Mic & Camera: Use the microphone and camera icons at the bottom of the screen to turn your audio or video on/off. Click the three dots (...) to select a different device for either input.
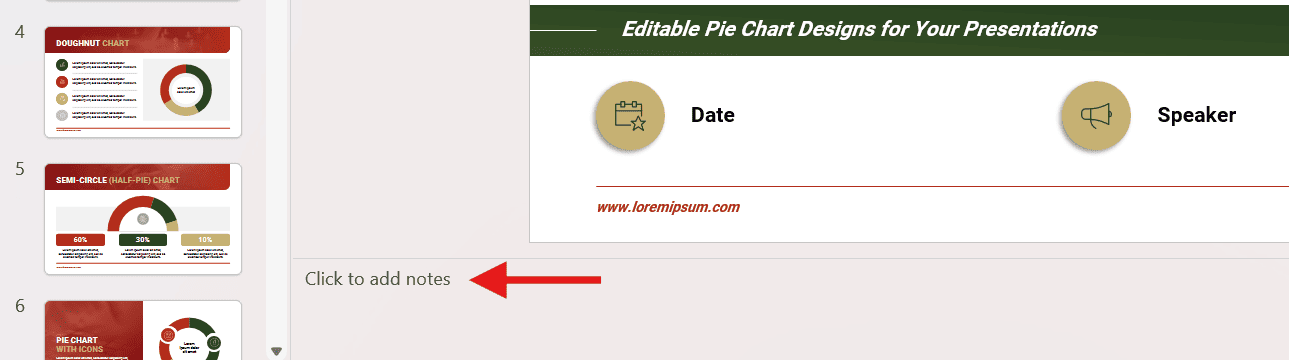
- Notes: Use the notes pane above the slide preview to read your speaker notes. If you have a lot of text, click the "enable auto-scroll" icon to set the speed at which your notes scroll.
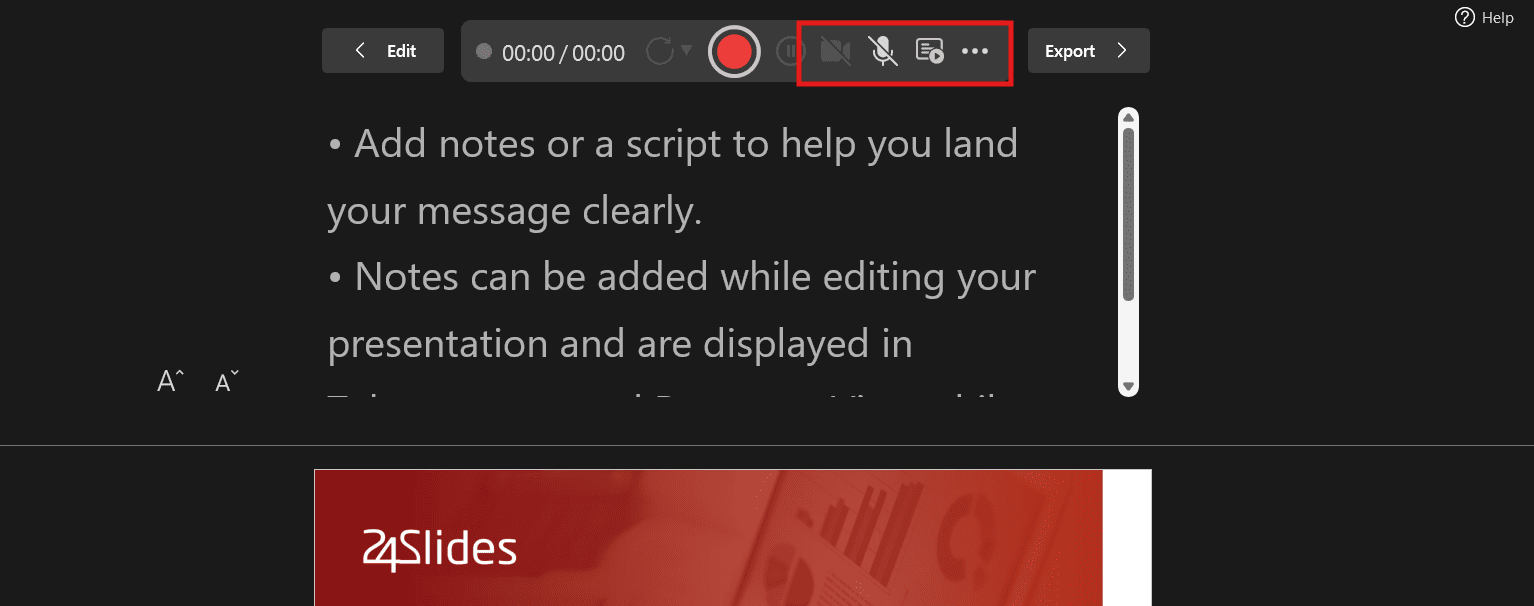
Pro-Tip: Use the Prompter! Reading your speaker notes in the Recording Studio is a fantastic way to deliver a smooth, confident narration. To add notes, select a slide and find the notes pane that appears below the slide. Click on "Click to add notes" and type your notes.
Step 3: Master Your Recording Controls & Start
Before you begin, get familiar with the tools you can use to manage your recording:
- Use the arrow buttons to advance through your slides.
- Use the pause button if you need to collect your thoughts or take a break.
- Use the "pointer options" to highlight key information on your slides.
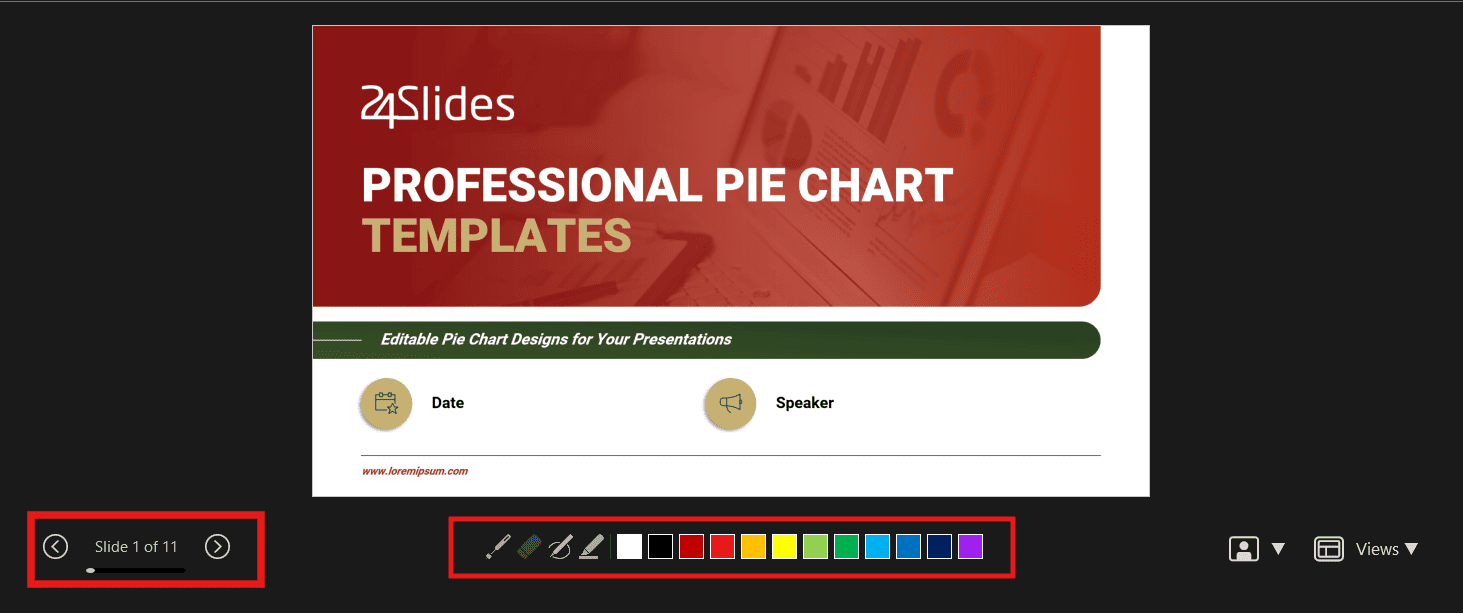
Once you are ready, click the Record button at the top left to begin. You'll see a countdown, and your recording will start. When you are finished, click the Stop button.
When you're finished recording your presentation, simply click the Stop button. After stopping, you can close the recording window.
Pro-Tip for Flexibility: Remember, your narration is automatically linked to each individual slide, giving you the flexibility to easily re-record specific slides if needed, without having to start over!
Step 4: Review Your Narration & Timings
Once you've completed your recording, it's crucial to review it before moving on. Here's what to look for on each slide:
- Video Narration: You'll see a small video icon (often a circle with your recorded video) in the corner of any slide where you recorded yourself.
- Audio Narration Only: If you only recorded audio, a small speaker icon will appear on each narrated slide.
Clicking on either of these icons allows you to preview your narration and slide timings. This is your chance to ensure everything sounds perfect, the visuals align correctly, and your message is delivered exactly as intended before you proceed to save your video.
How to Add Audio from a File or Recording
If you have a separate audio file (like background music or a pre-recorded voiceover) or want to record a short audio clip directly on a slide, follow these steps.
- On the main ribbon, go to the Insert tab.
- Click Audio, and you'll see two options:
- Audio on My PC: Choose an existing audio file from your computer.
- Record Audio: Record a new, short audio clip for the current slide.
- A small speaker icon will appear on your slide. Click it to access more options. The Playback tab will appear in the ribbon.
How to Save a PowerPoint as a Video (Windows & Microsoft 365)
PowerPoint makes it easy to convert any presentation, from simple text to rich multimedia, into a widely compatible MP4 file ready to share. This extends your content's reach and impact.
This guide will show you how to save a presentation including recording, for a polished, self-running video. If you haven't added narration, you can still create a video, but you'll need to set slide timings for automatic playback.
Note: While adding narration/ audio, as discussed in the previous section, can significantly boost engagement, it's an optional step. If you're creating a silent video, like for a kiosk, feel free to proceed without it.
Step 1: Prepare Your Presentation (Slides, Animations, and Timings)
Before converting your PowerPoint into a video, take a moment to ensure everything is perfect. Your video will be exported exactly as you configure your presentation now.
- Content Accuracy: Proofread your content for grammar or accuracy errors.
- Finalize Animations & Transitions: Confirm that all your animations and slide transitions are complete and in the correct order.
- Review Recorded Narration (If Applicable): If you've recorded narration, listen to it one last time to ensure it's perfectly synchronized.
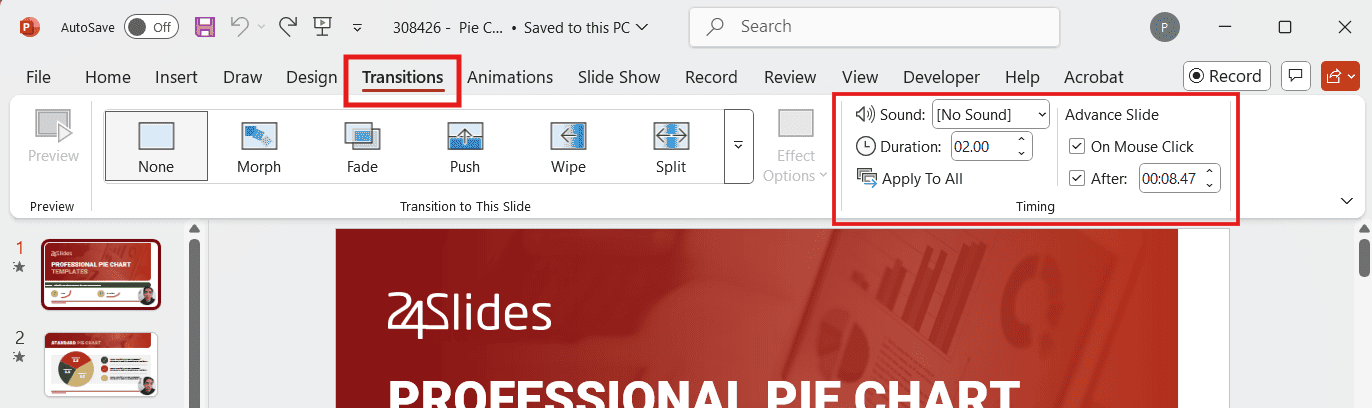
- Set Slide Timings (Crucial): If you don't have recorded narration (which would set timings automatically), you can manually adjust these in the 'Transitions' tab under 'Advance Slide'. This controls how long each slide is visible in your final video.
Step 2: Navigate to the Export Menu
- On the main ribbon, go to File and select Export.
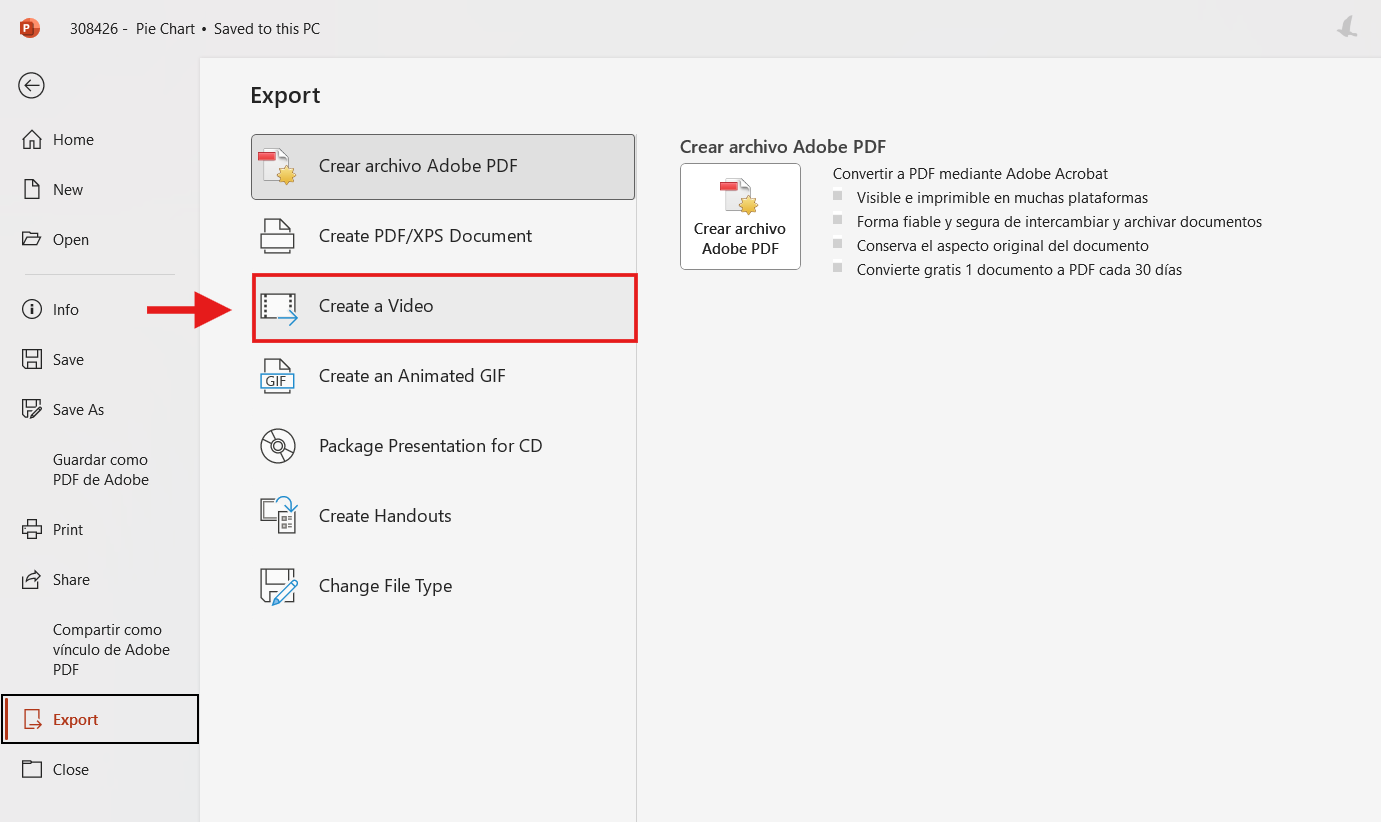
Step 3: Select 'Create a Video' from the Options
- From the export menu, choose the Create a Video option.
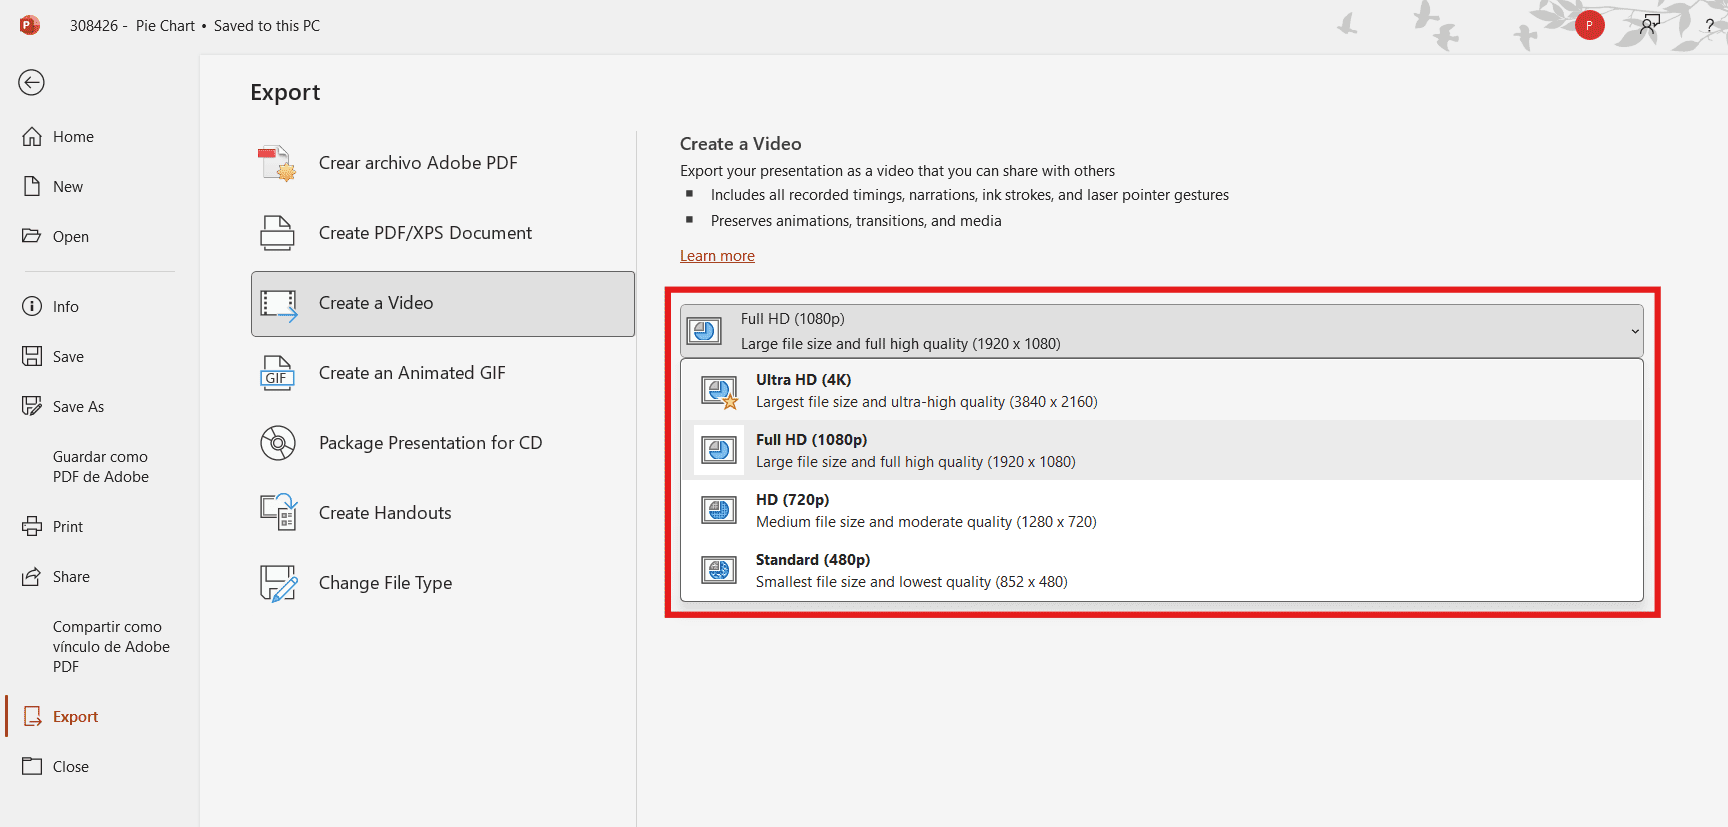
Step 4: Choose Your Video Quality (SD, HD, Full HD, & 4K)
- Select the video quality you want for your presentation. Take into account that higher-quality videos will have larger file sizes.
Pro-Tip: Full HD (1080p) is the most balanced option, offering excellent quality without a very large file size.
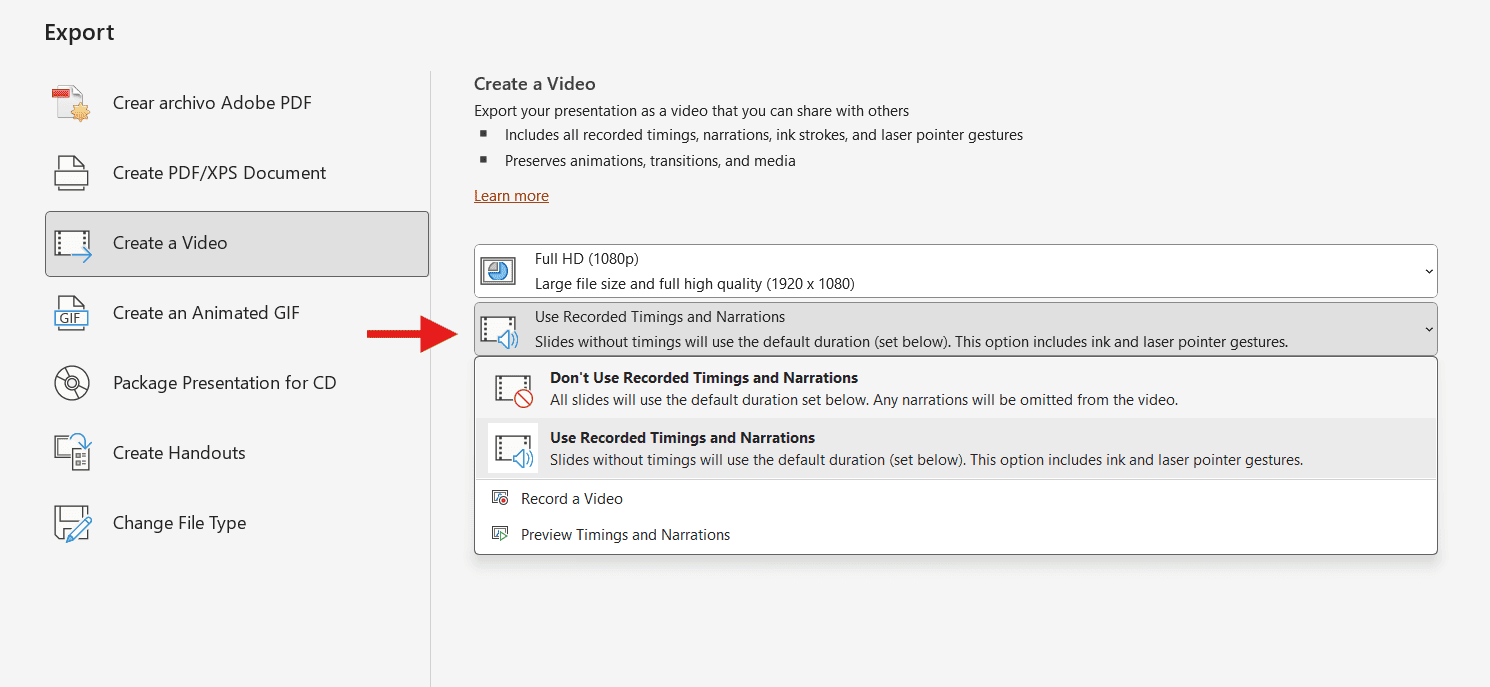
Step 5: Choose to Include Recorded Timings and Narrations
This option determines if your video uses pre-recorded audio and timings.
- Use Recorded Timings and Narrations: Select this if you have already recorded a voiceover, laser pointer gestures, or set specific slide durations. The video will be synchronized to your recording.
- Don't Use Recorded Timings and Narrations: Choose this for a silent presentation or to set a consistent duration for all slides. You will need to enter the number of seconds for each slide in the box below.
Step 6: Create and Save Your Video (PowerPoint to MP4)
- Click the Create Video button to save your presentation.
- In the pop-up window, enter a file name and, in the Save as type dropdown, choose MPEG-4 Video (.mp4). This is the recommended format for the best compatibility.
- Click Export to save your video. A progress bar will appear at the bottom of the window to indicate when it's complete.
Frequently Asked Questions (FAQ)
How to Save a PowerPoint as a Video on Mac?
- Open your PowerPoint presentation.
- Go to File > Export.
- Enter a name for your video in the Save As box.
- Choose where you want to save it in the Where box.
- Under File Format, select MP4 or MOV.
- Pick the video quality (higher quality = larger file size).
- If you have timings or narrations, check Use Recorded Timings and Narrations.
- Click Export.
Your PowerPoint will now be saved as a video file you can play or share.
How can I make a video exported from PowerPoint play in a loop automatically?
To make a video you've exported from PowerPoint loop automatically, you'll need to use your video player's settings, not PowerPoint itself.
On Windows (using Windows Media Player):
- Open your video in Windows Media Player.
- Click the Repeat button in the playback controls, which looks like a looping arrow icon. You can also use the shortcut Ctrl + T.
- The video will now play continuously until you stop it.
On Mac (using QuickTime Player):
- Open the video file in QuickTime Player.
- Go to the menu bar and choose View.
- Select Loop.
- The video will now play in a continuous loop.
What are the differences between MP4 and WMV formats in PowerPoint?
The main differences between MP4 and WMV formats in PowerPoint are:
MPEG-4:
- Compatibility: The most popular and widely compatible video format, suitable for almost all devices and platforms.
- File size: Better compression with less quality loss.
- Quality: It supports 4K with better visual clarity.
WMV (Windows Media Video):
- Compatibility: A format optimized for Windows systems.
- File size: Usually smaller files, more compact
- Quality: Standard, less effective for ultra-HD content (4K)
How to turn a PowerPoint into a video?
To convert your PowerPoint into an MP4 video, follow these simple steps:
- Go to File > Export > Create a Video.
- Choose your desired video quality.
- Select whether to use recorded timings.
- Click Create Video.
- In the new window, enter a file name, select MP4 or WMV as the format, choose where to save it, and click Save.
For a complete guide, see the section above.
What's the difference between saving as a video and saving as a Show (.ppsx)?
Both options let you share your slides so they play automatically, complete with animations, transitions, and even narrations. At first glance, they look the same when opened. The key difference is that a video works everywhere but can’t be edited, while a PowerPoint Show (.ppsx) requires PowerPoint to open and remains fully editable.
Saving as a Video
- Exports as MP4 or WMV.
- All animations, transitions, timings, and narrations are baked in.
- Non-editable after export.
- Perfect for sharing with people who don’t have PowerPoint or for uploading to video platforms.
Saving as a PowerPoint Show (.ppsx)
- Requires PowerPoint to open.
- Launches directly in slideshow mode.
- Fully editable in PowerPoint.
- Keeps animations, transitions, narrations, and timings as interactive content.
Pro Tip: Want your slides to play automatically in a .ppsx file? Check out our guide on how to play slides without clicking.
Go From Slides to Standout Presentations with 24Slides
Now that you know how to turn your PowerPoint into a video, it's time to ensure that the presentation design is unforgettable. That's where 24Slides comes in!
As the world’s largest presentation design company, we have a track record of excellence. With over 12 years of experience, our team of 200+ dedicated designers has crafted more than 1.5 million slides for clients worldwide.
At 24Slides, we design stunning, video-ready presentations, from corporate decks to sales pitches. We craft the custom animations and transitions that will make your video shine, all delivered with quick turnaround times.
Ready to see the difference for yourself? For $1, you’ll receive a custom, editable one-slide presentation tailored to your brand.
This is a full $43 value, offered to you for only $1.

Want to make better PowerPoint slides? Read this!